# Mason
As Flutter projects grow, maintaining consistency and efficiency in your codebase becomes more important than ever. **Mason** is a powerful tool that optimizes your development process by generating reusable code templates. This guide will help you understand the benefits of Mason, how to set it up, and how to integrate it into your Flutter project.
## **Why Choose Mason for Your Flutter Project?**
### **Optimize Code Reusability**
As your project expands, using standardized code templates becomes essential. **Mason** allows you to encapsulate best coding practices into reusable templates, saving you time instead of rewriting or copying code.\
It generates structured code, reducing syntax errors and speeding up development. The tool supports large, customizable templates that can be used across multiple devices.
### **Enhance Team Collaboration**
Different coding styles can lead to inconsistencies in the codebase. **Mason** helps standardize your team's coding practices by providing a shared template structure, ensuring clean and maintainable code.\
By using **Mason**, you can ensure that your code follows a consistent style and structure, making it easier to maintain and scale.
### **Save Time and Effort**
Writing code from scratch is time-consuming. **Mason** automates this process, allowing you to focus on the more critical aspects of your project.
## **Setting Up Mason in Your Flutter Project**
### **Installing Mason**
To get started, visit the **Mason CLI** guide for installation instructions. Assume you have set up a directory named `mason_core` to store Mason templates.
### **Creating a Mason Template: dr\_screen**
#### **Step 1: Navigate to the Mason Directory**
Navigate to the Mason Directory
Open the terminal and move to the `mason_core` directory:
```bash
cd /path/to/mason_core
```
**Tip:**
* In your IDE, select the `mason_core` folder, press **Ctrl/Command + Shift + C**, or **right-click → Copy Path** to quickly copy the directory path.
#### **Step 2: Create a New Template**
Run the following command to create a new Mason template named `dr_screen` in the `dart/` directory:
```bash
mason new dr_screen -o dart/
```
#### **Step 3: Declare the Template in mason.yaml**
Create a New Template
Add the following entry to the `mason.yaml` file:
```yaml
dr_screen:
path: dart/dr_screen
```
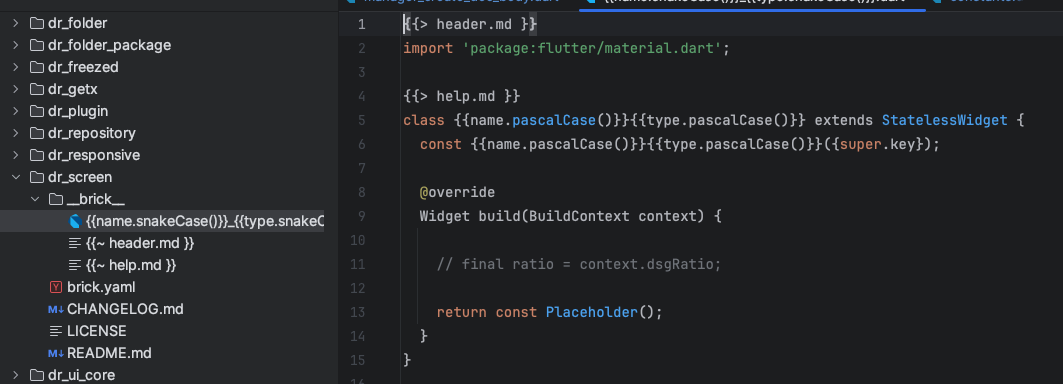
#### **Step 4: Customize the Template**
Customize the Template
Add necessary files to the `__brick__` directory. Declare variables in `brick.yaml` to allow customization:
```yaml
vars:
- name
```
Mason will use these variables to generate code dynamically based on user input. Common Dart naming conventions include:
* `HelloWorld` → `{{name.pascalCase()}}`
* `hello_world` → `{{name.snakeCase()}}`
* `helloWorld` → `{{name.camelCase()}}`
* `Hello World` → `{{name}}`
Refer to the **Mason CLI** documentation for more transformation examples.
#### **Step 5: Update Mason**
After setting everything up, run the following command to update Mason:
```bash
mason upgrade
```
## **Using Mason to Generate Code**
### **Step 1: Navigate to the Mason Directory**
```bash
cd /path/to/mason_core
```
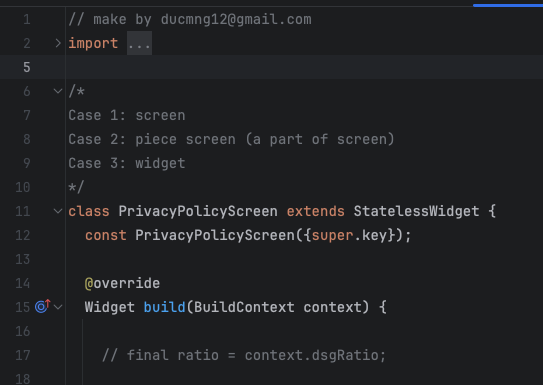
### **Step 2: Generate Code from the Template**
Generate Code from the Template
Run the following command to generate code from the `dr_screen` template:
```bash
mason make dr_screen -o /path/to/your/desired/directory
```
Replace `/path/to/your/desired/directory` with the path where you want the code to be generated.
## **Setting Up Mason in a New Project**
Mason can be used anywhere on your machine. If you want to move the `mason_core` directory to another project or reinstall it on a new machine, follow these steps:
### **Step 1: Install Mason**
Skip this step if Mason is already installed:
```bash
dart pub global activate mason_cli
```
### **Step 2: Navigate to the Mason Directory**
```bash
cd /path/to/mason_core
```
### **Step 3: Update Mason**
```bash
mason upgrade -g
```
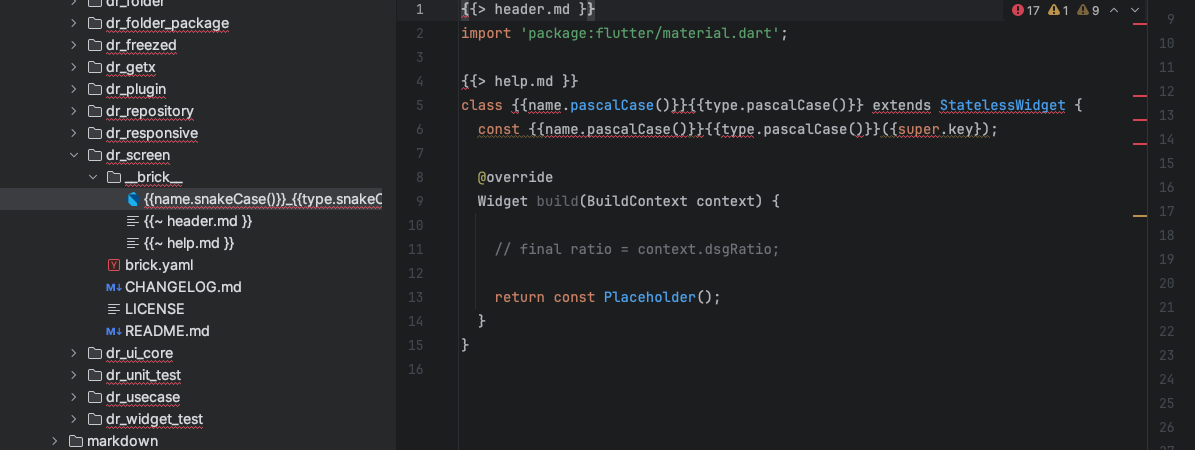
## **Disabling Dart Analysis for Mason**
Disabling Dart Analysis for Mason
When adding **Mason** to a project, **Dart Analysis** may flag syntax issues in `mason_core`. To disable these warnings, follow these steps:
### **Step 1: Update analysis\_options.yaml**
Add the following lines to your `analysis_options.yaml` file:
```yaml
exclude:
- packages/core_mason/**
```
### **Step 2: Restart Dart Analysis**
Restart Dart Analysis
## **Community Resources**
Here are some **Mason** templates I frequently use. You can explore and use them for free on **BrickHub**:
* [**dr\_base\_model**](https://brickhub.dev/bricks/dr_base_model) – A base model template for API data
* [**dr\_base\_project**](https://brickhub.dev/bricks/dr_base_project) – A base Flutter project template
* [**dr\_bloc**](https://brickhub.dev/bricks/dr_bloc) – A BLoC template with common features
* [**dr\_change\_notifier**](https://brickhub.dev/bricks/dr_change_notifier) – A ChangeNotifier-based template
* [**dr\_clean\_arch**](https://brickhub.dev/bricks/dr_clean_arch) – A clean architecture template for large projects
* [**dr\_entity**](https://brickhub.dev/bricks/dr_entity) – Generates models using `json_serializable`
* [**dr\_enum**](https://brickhub.dev/bricks/dr_enum) – An enum template for complex states
* [**dr\_freezed**](https://brickhub.dev/bricks/dr_freezed) – Generates models using `freezed`
## **Conclusion**
By integrating **Mason** into your Flutter development workflow, you can significantly enhance efficiency and maintain a consistent codebase. This guide provides a complete overview of setting up and using Mason to fully leverage its potential in your projects.
[Buy Me a Coffee](https://buymeacoffee.com/ducmng12g) | [Support Me on Ko-fi](https://ko-fi.com/I2I81AEJG8)
.png?alt=media)
.png?alt=media)